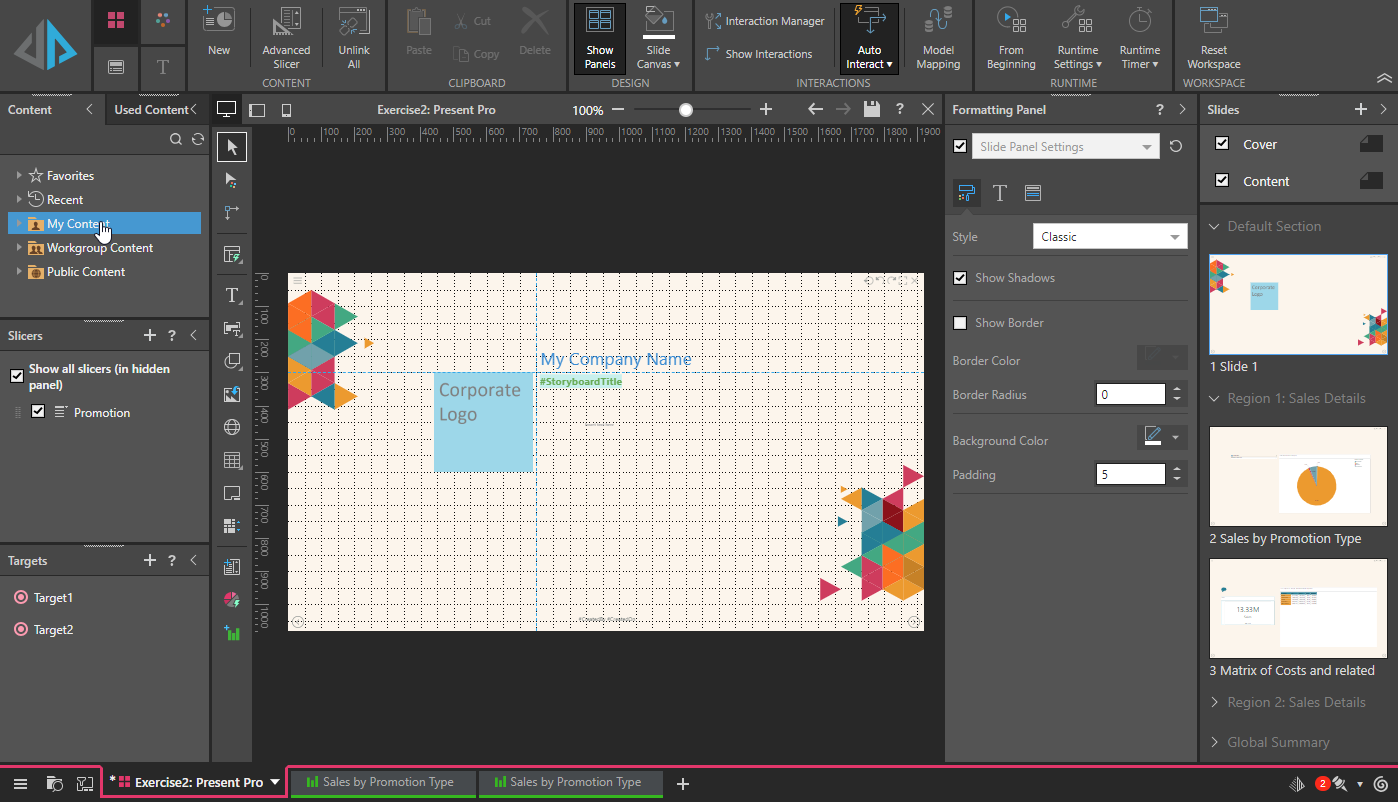
Building your presentation using Present Pro is an intuitive and flexible process, with each action achieved either manually through a simple point-and-click functionality or using natural language prompts in the Chatbot. There are two main components of building a basic presentation; first adding the data-driven content items that communicate your analytic information to your viewer, then updating the design and formatting of the slides and of the whole presentation. Together, they allow you to create a meaningful and professional-looking presentation that will satisfy the needs of many different audiences.
Note: The Pro experience, for users with a Pro license, is a more sophisticated version of the app; giving you more functionality and more flexibility than users of the Lite app. The Pro app usually comes with all sophisticated features enabled, however, admins can disable advanced options and certain advanced analytics within Present Pro using user profiles. This can be either for specific users or applied to all users with a particular role.
Build your presentation

Getting started
If this is the first time you have used Present Pro, or you want to walk through a step-by-step presentation-building process to get familiar with the steps, you should follow our getting started exercises:
- To learn how to use the Chatbot, see Exercise: Building a Presentation using the Chatbot
- To learn how to use Present Pro, see Exercise: Building a Presentation with Present Pro
Tip: It is important to note that using the Chatbot will add content items (visuals, slicers, KPIs, and so on) and a title, select a layout, add an insights panel, and so on, all in one move and all in response to your natural language prompts. You might, therefore, want to consider creating your slides using Chatbot and then editing them using the manual steps described in this section if you need to.
Add or change content
New presentation
Create a new, empty, presentation using the New Presentation wizard. Once this presentation is created, you can manage its content following the subsequent sections.
- For more information, see Building a New Presentation in Present Pro
Content items
Add data-driven or other content items to your slides. You can select existing or create new visuals, add slicers that let you filter the presentation's content items at runtime, add dynamic, variable, or static text boxes, add infographics built in Illustrate, and so on. The options for performing these tasks are largely available from the Present Pro Toolbox, to the side of the canvas.
- For more information, see Adding Content Items in Present Pro
Interactivity
Add actions and interactions to your presentations that allow your users to explore their visuals and other content items at runtime. Actions allow your users to jump to another place in the presentation (slide, mini-tab, or content item), open a URL, open a tooltip, or run a custom script, typically from the right-click menu. Interactions indicate which visuals and other dynamic assets should be filtered, highlighted, and synchronized in response to selections or multi-selections from other slicers or visuals.
- For more information, see Interactivity in Present Pro
Update design and formatting
Select theme and add formatting options
The design of your presentation can be made consistent and professional by adding a theme that applies to the whole presentation, deciding whether to include a cover page, and adding design elements to the slides such as titles, footers, and so on. The options are largely available from Present Pro's Design ribbon, above the canvas.
- For more information, see Formatting in Present Pro
Use layout containers, capabilities, and tools
In addition to your standard formatting options, you can also make use of advanced layout tools that help you to draw your presentation (guidelines, grids, alignment, and so on), extended layout capabilities that professionalize your content (scaling, miniatures, and so on), and container options that enable better use of your available presentation real estate (organizing your content onto tabbed or scrollable "containers," for example).
- For more information, see Layout Management in Present Pro
Settings and configuration
Configure runtime settings
The Runtime Settings are used to configure some of the behaviors and options that apply when a presentation is launched at runtime. These settings define the scope of interactions between visual instances on different slides in your presentation, enable and disable options on the panel tools, right-click context menus, and so on, customize the data model hierarchies that are shown to users in the Dice, Add, and Swap context menus, and customize any presentation timers used for slide shows or regular query refreshment.
- For more information, see Runtime Settings in Present Pro
Configure app settings
The Refresh Snapshots option allows you to ensure that all users see an up-to-date "snapshot" (also known as a thumbnail) when they view details of a presentation or publication in the Content Manager.
- For more information, see Refresh Snapshots in Present Pro